If your refrigerator begins to falter, one possible culprit could be the start relay. This integral part of the appliance ensures that the compressor — the heart of the refrigerator — starts and runs as it should. But when a start relay falters, your refrigerator might cease to cool effectively or may not start at all. This article delves into how to test a refrigerator start relay using a multimeter. We’ll explore each step of the process to diagnose and potentially solve this electrical puzzle, so you can decide if it’s time to replace the relay or further troubleshoot the problem.
Maintaining your refrigerator in optimal condition is essential to ensure food safety and reduce energy costs. The start relay works hand in hand with the start capacitor to initiate the compressor’s run windings, and if this starting device is malfunctioning, the refrigerator simply will not work efficiently, if it starts at all. A multimeter can help you to diagnose and troubleshoot starting relays before deciding on the purchase of a new one. Whether you have PTC relays, overload relays, or run capacitors, understanding how to test these components with a multimeter is an invaluable skill for any DIY enthusiast.
Understanding the Refrigerator Start Relay
A refrigerator start relay is a small device that energizes the start windings of a compressor to kick off its cycle. It plays a pivotal role, as it helps jumpstart the compressor, which in turn fires up the refrigerator’s cooling system. The relay operates alongside the starting capacitor to provide a boost to the compressor upon activation. Without a fully functional start relay, your compressor will either not run or could overheat and malfunction due to excessive strain.
The Multimeter: Your Diagnostic Tool
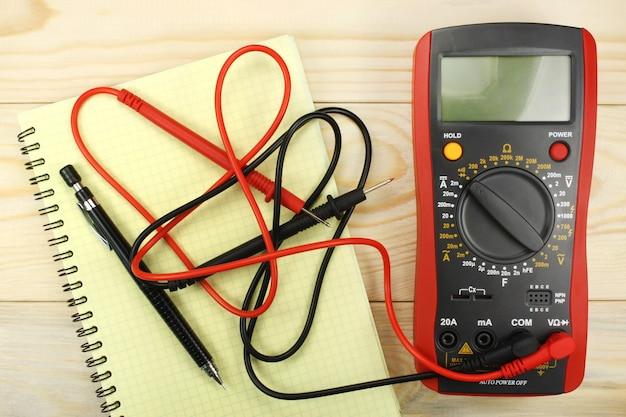
A multimeter is a versatile instrument used to measure electrical values such as voltage, current, and resistance. For refrigerator diagnostics, the resistance or continuity settings are typically used to test the functionality of relays and capacitors. The multimeter will help determine whether there’s an unbroken path (continuity) through the start relay, indicating its operability.
Preparing to Test the Start Relay
Begin by assembling the necessary tools for the test, such as a multimeter, screwdriver, and needle-nose pliers. It’s crucial to prioritize safety by ensuring the refrigerator is unplugged before proceeding to avoid any risk of electric shock. Additionally, being aware of the compressor and other sensitive components while working is vital so as not to cause any damage.
Locating the Start Relay
The start relay is generally mounted on the side of the compressor, accessible from the back of the refrigerator. Depending on your refrigerator model, you may need to remove a panel or cover to reach the relay. Before touching anything, ensure that the refrigerator has been unplugged, and the power supply is fully disconnected.

Testing the Relay with a Multimeter
First, configure your multimeter to measure resistance or set it to the continuity test mode. If your multimeter has an adjustable range, select the lowest setting that is greater than the expected resistance of the start relay. This ensures an accurate reading. If you are using a digital multimeter, it might emit a beep if there is continuity.
Detaching the Relay
Using a screwdriver or pliers, gently detach the relay from the compressor housing. It is essential to remember the positioning of any wires connected to the start relay for accurate reinstallation. You might consider taking a photo or making a note for reference.
Conducting the Test
With the relay detached, locate terminals 1 and 2 on the relay. These are typically where the multimeter probes need to make contact. Carefully place the probes onto the terminals and observe the reading. A functional relay will show a low resistance value, while an open circuit or a significantly higher resistance value than expected indicates a faulty relay.
Identifying a Faulty Relay
If the multimeter reads ‘OL’ or doesn’t show any continuity, this means the relay is likely defective and should be replaced. On the other hand, if you observe a reading that falls within the normal resistance range (which can vary across different refrigerator models), the relay is likely functional.
Table 1: Example Multimeter Readings and Interpretations
| Reading on Multimeter | Indication |
|---|---|
| Low Resistance Value | Relay is likely functional |
| OL or No Continuity | Relay is defective |
| Unexpectedly High Resistance | Potential fault in relay |
Analyzing Test Results and Next Steps
Once you have the multimeter readings, it’s essential to interpret them correctly. If resistance readings indicate a faulty relay, obtaining a new one and replacing it is the next step. Sometimes, it’s advisable to consult with a professional technician, especially if you are not confident in identifying the issue or handling the components. Continuous appliance functioning will depend on whether the start relay successfully engages the compressor’s run windings.
Steps for Replacing a Faulty Start Relay:
- Purchase the correct replacement relay, keeping in mind the specifics of your refrigerator model.
- Following your previous notes, rewire the new relay to the compressor’s electrical terminals.
- Reattach the relay to the compressor and secure any covers or panels.
- Plug in the refrigerator and monitor it to ensure that it starts correctly and runs smoothly.

Conclusion
Testing a refrigerator’s start relay with a multimeter is a straightforward process that can save you time and money on repairs. By following the detailed steps to diagnose the functionality of your refrigerator’s starting component, you could restore its performance without needing professional intervention. However, if after testing the relay your refrigerator still does not run or starts with difficulty, it may be wise to consult a technician to troubleshoot further or inspect other electrical components like the compressor or start capacitors.
Frequently Asked Questions (FAQs)
How do I know if my refrigerator’s start relay is bad without using a multimeter?
A faulty relay could manifest through clicking noises coming from behind the refrigerator, the unit not starting up, or a failure to keep the contents cool. While these symptoms suggest an issue, a multimeter provides a more precise diagnosis.
Can I replace the refrigerator start relay by myself?
Yes, if you are comfortable with basic electrical tasks and follow safety protocols, you can replace the start relay yourself. Always refer to your refrigerator’s manual for the correct part number and installation instructions.
Is it safe to test the start relay with the refrigerator plugged in?
No, for safety reasons, you should always unplug the refrigerator before performing any electrical tests, including testing the start relay.
What is the typical resistance reading for a functioning start relay?
While normal resistance values can differ between refrigerator models, a general functioning relay will usually read between 0 to 1 ohms. Always check the manufacturer’s specifications for the precise values.
If my refrigerator’s start relay is working, what else could be the problem?
Other issues could include a failed compressor, a faulty thermostat, or an inadequate power supply. These possible causes will likely require further diagnosis or a professional repair service.